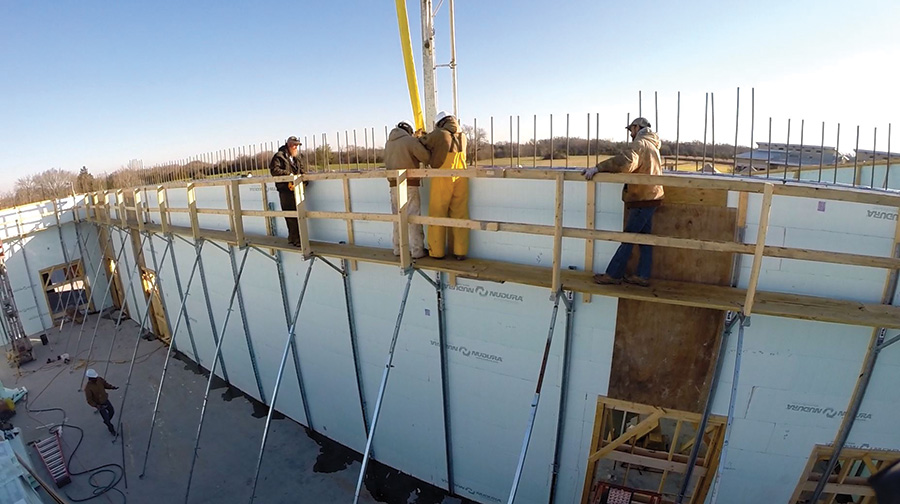
From ICF Magazine.
*Please note that while Denver Concrete Vibrator does sell vibration equipment to consolidate concrete in Insulated Concrete Forms, we do not sell the actual forms themselves.
ICF 101
As Insulated Concrete Forms (ICFs) become more common, a growing number of builders and concrete contractors are considering adding this skill set to their business. Additionally, do-it-yourself owner/builders are frequently attracted to ICF construction, as it provides a structure of exceptional quality at a reasonable price.
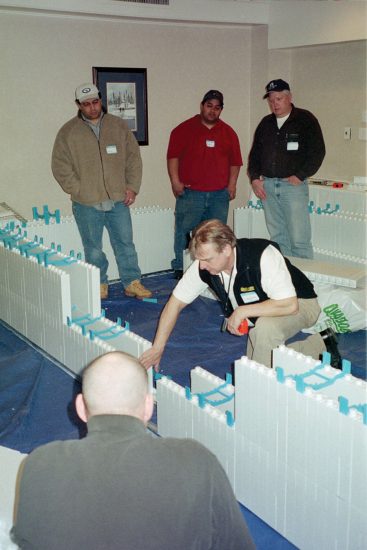 With proper training, good bracing and correct concrete placement methods, it’s possible for just about anyone to build structures of outstanding beauty, durability, and energy-efficiency. For contractors already familiar with building codes, construction timelines, and concrete, it’s even simpler.
However, it’s not as easy as “stacking legos,” and even small mistakes can have disastrous consequences.
Training
For those new to ICF work, three items are essential: professional training, on-site guidance, and access to equipment. Otherwise, the finished project is likely to not look good, meet code, and/or have the required structural integrity.
The place to start is a training class offered in-person by a manufacturer’s representative. These are available in virtually every major city in North America. The American Institute for Architects offers AIA-accredited seminars geared towards teaching architects about ICFs. AIA-accredited seminars (or any other instruction that is classroom-only) are useful, but inadequate as stand-alone training. The prospective builder should insist on a hands-on training course that involves stacking the forms, installing bracing, setting window bucks, and so forth. It will take the better part of a day, at least. This kind of training seminar is usually free, although a few require payment (which is typically refunded with the first order of forms).
It’s best to follow-up on the course by working under the direction of a qualified professional for a few days. Often there are opportunities closer to home through programs like Habitat for Humanity. A week-long training course on a jobsite is optimal,
but rare.
For those planning on making ICFs a significant part of their business, the larger ICF brands offer advanced training on topics such as ICF sales and marketing, value engineering, bidding bigger projects, networking, contracts and construction management.
Getting Started
ICF work starts with accurate, dead-level footings. Any deviance in the footing from straight, level, or plumb will cause significant problems later, as ICF walls, when filled with concrete, will move so they are perpendicular to the surface. Bows or dips will also create hassles. If the footing is lower in the middle than at the corners, the wall will get tight as it goes up. If the footing is humped, the corners will be pushed out of plumb. The extra time (or money) spent to get dead-level footings will pay dividends the rest of the way up.
With footings in place, the outside edge of the walls is marked with a chalkline, noting all door openings. Then the first row (course) of forms is set into place, starting at the corners. The outside edge of this bottom course is fastened to the footing using either polyurethane foam, metal track, or sometimes lumber.
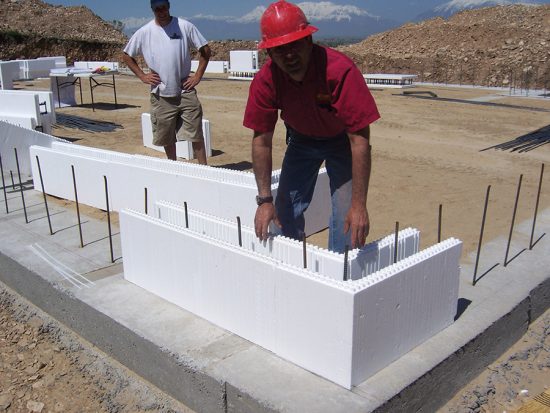 From there, the forms go up like brickwork, taking care that each form overlaps the one below it by half a length or so, and that the ties (webs) line up vertically. Most modern blocks are reversible, so corners can be flipped, but a few are not and have specific left- or right-hand corners. Horizontal reinforcing steel is added as the wall goes up. It simply sets in the rebar saddles molded into the form ties. If the engineer was good, he matched the rebar spacing to the height of the block.
For convenience, the joint/seam between the blocks (created by working from the corners to the middle) should be at either a door or a window opening. In some cases, the wall length will match the block interlock pattern perfectly. Otherwise, there will be a single seam running the full height of the wall that requires additional reinforcement.
Bucking
Set the window bucks as the wall goes up. Wooden bucks are the most common—they work well and are economical—but they’re not the only option. If wood is the choice, use only pressure treated lumber and/or exterior grade plywood. Two 2x4s on edge for the bottom of the window buck will create the gap for concrete placement. Nails hammered into the outside surface of the buck will ensure it stays locked into place after the pour.
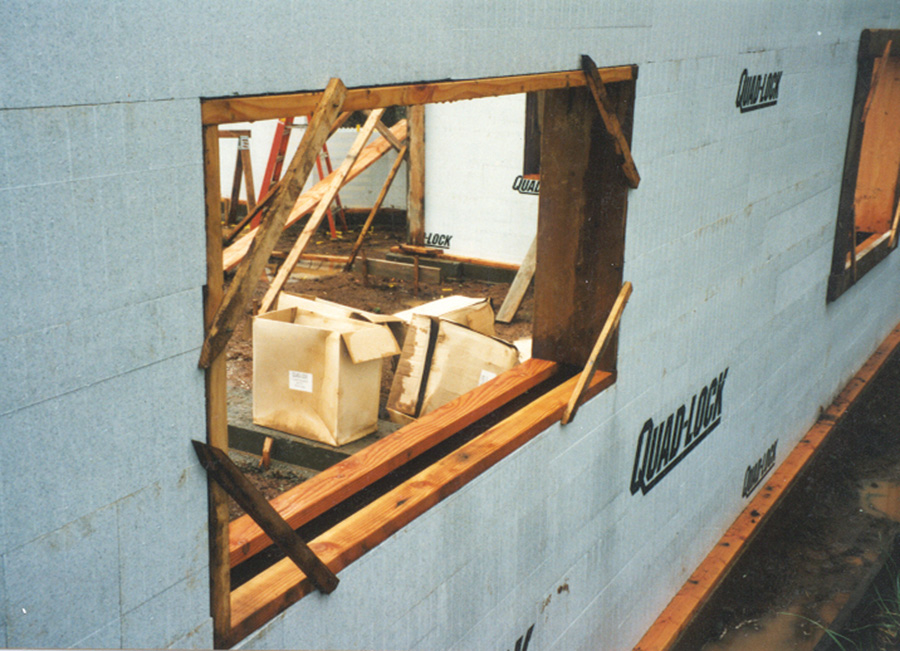
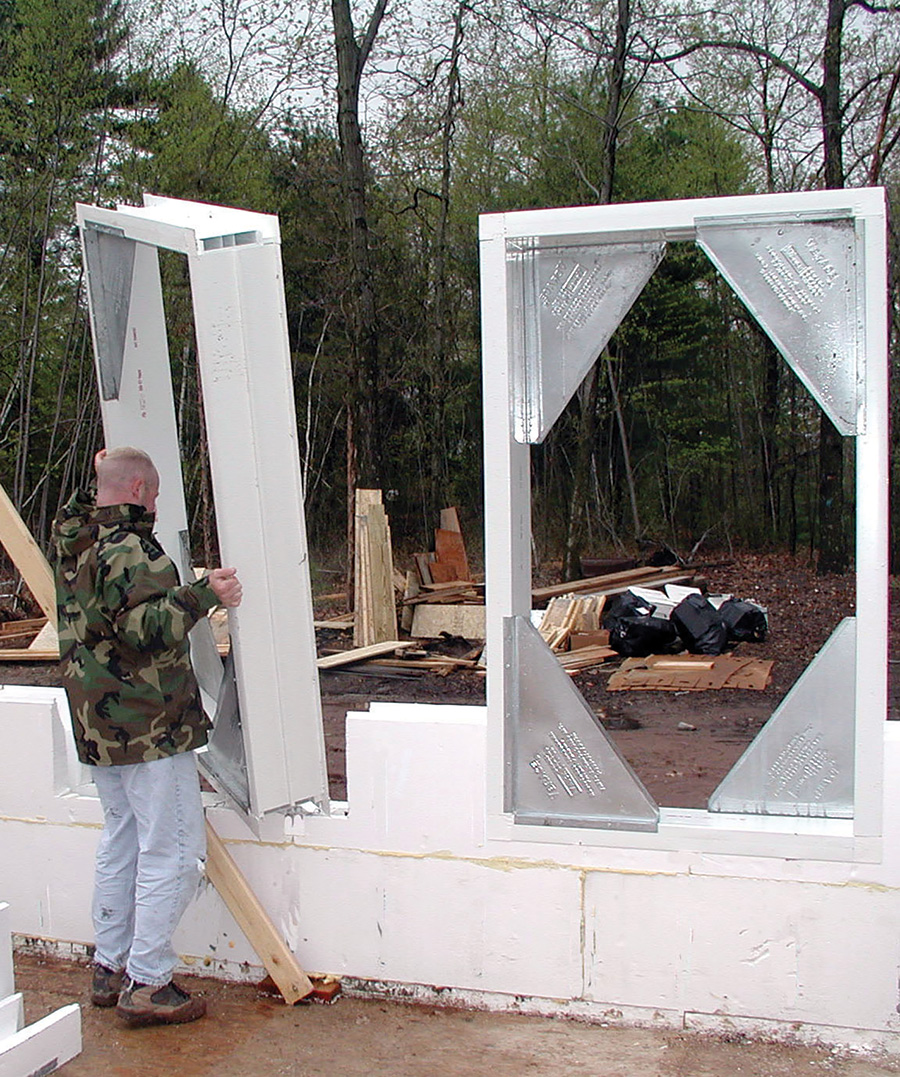 Vinyl bucks are lightweight, termite-proof, and are superior for arched, gothic, or round windows.
EPS bucking systems offer better insulation values, but need extensive wooden reinforcement until the concrete sets. They can be site-fabricated from regular straight ICF forms by cutting the ties down the middle and ripping the panel to match the core width of the form. The cut half-ties anchor the bucks to the concrete; the furring strips provide attachment points for the window and door frames.
For large commercial work, steel “framing assemblies” combine the buck, frame, jamb, and finish flashings into a single component.
Regardless of the material, bucks need to be squared up and reinforced vertically and horizontally every 24″ on center to prevent sagging and blowouts. The bottom edge of window bucks need access ports to ensure concrete fills that part of the wall completely. Many find that building the bucks off-site will increase on-site productivity and keep the jobsite clean.
Bucks are secured to the wall with wire ties, reinforcing tape, or screws.
Bracing
Once walls reach three courses high (four feet) bracing is needed. While it’s possible to use wood, virtually everyone uses steel turnbuckle bracing, which allows the builder to make minor adjustments to the wall immediately after it’s filled with concrete. They also include an integral catwalk and safety rail.
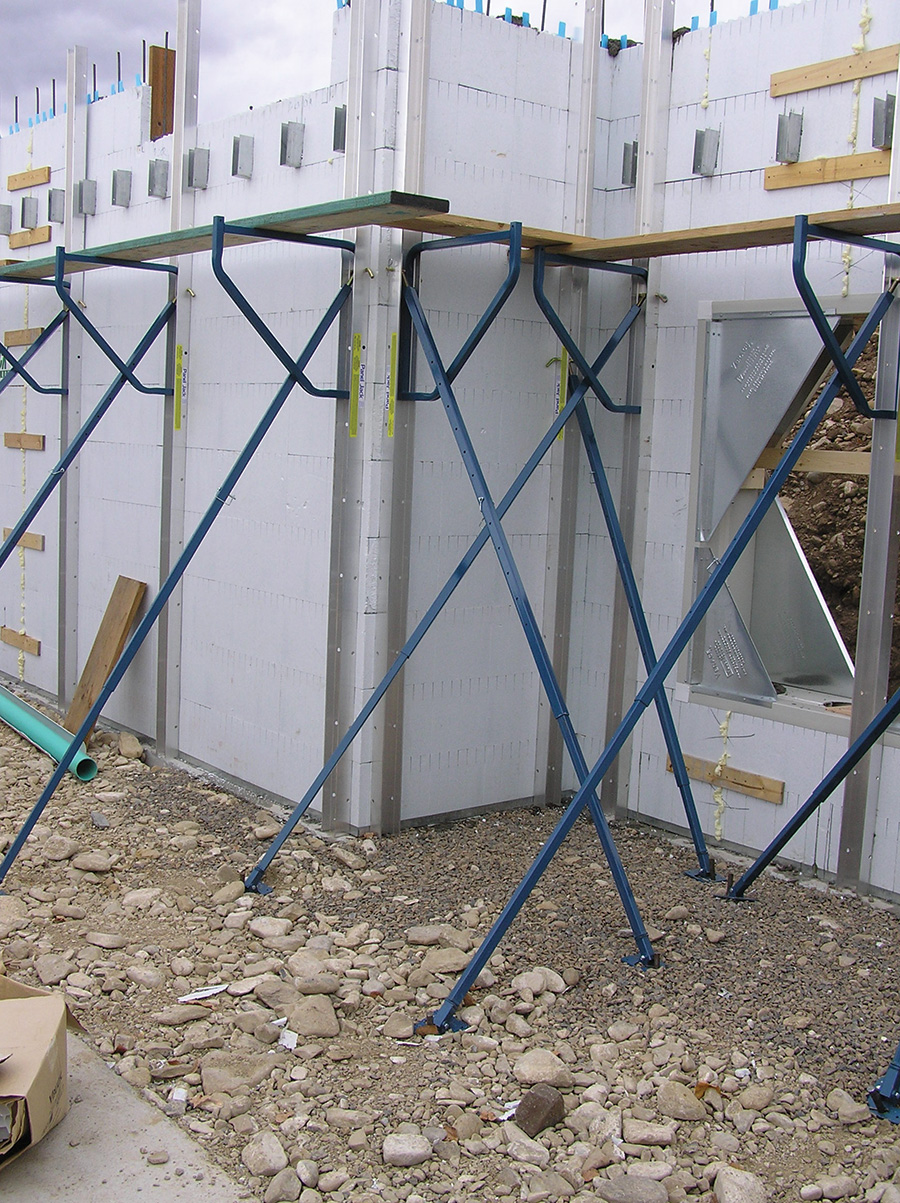 For part-time or amateur builders, bracing can often be rented from the same establishment that sells the forms. Steel turnbuckle bracing such as Giraffe and Plumwall is durable, easy-to-use, and delivered in neatly organized crates. For those that can’t spare the expense, Fab-Form’s Zont allows the builder to create a adjustable bracing system from re-useable 2x4s assumed to be at the site.
Typically it’s one brace for every five or six feet of wall, with additional braces on each side of the windows, doors, and corners. A good rule of thumb is 32 units for a 1,500 sq. ft. basement.
Bracing is usually attached to the interior side of the walls. The strongback is screwed to the wall’s furring strips—just snug—ensuring the screw stays in the middle of the slot. This will allow for any movement that takes place.
Plumb the wall with a level, then stake the turnbuckle to the ground, or screw it securely to the subfloor.
Final Checks
With the walls at full height, weak points are reinforced with strapping tape, plywood, and lumber. Many brands need very little reinforcing. Those with thinner sidewalls sometimes need quite a bit. Radius walls, which are easy to stack, typically require extensive reinforcing. Other weak points are corners, lintels, and narrow columns. Some recommend using steel truss wire at the top of walls for added rigidity.
If the wall is continuing upward after the first pour, protect the form interlocks with packing tape.
If the form manufacturer’s recommendations are followed, bulges and blowouts are rarely a problem. It’s good practice to keep extra reinforcing materials on hand for pour day just in case.
Stretch a stringline from corner to corner on the outside of the wall to ensure the wall is straight and plumb. The wall should be about ¼ inch inside of plumb just before pouring, as it will shift outward when filled with concrete. If it doesn’t, it’s a simple matter to push it to the stringline with the turnbuckle.
The two most important points in an ICF build is when it comes off the footing, and the day of the pour. If the form distributor or ICF consultant has offered technical assistance, they should visit the jobsite and inspect every detail prior to pour day, checking the bracing, scaffold planks, wall reinforcement, bucking and so forth.
Take the time to carefully inspect every element of the wall prior to pour day. ICF construction is not forgiving. A wall with a typical 6” core will weigh about 1,000 lbs. per linear foot of wall, and if the wall is wavy or out-of-plumb due to inadequate bracing, or if there are bulges, blowouts or sagging lintels, good solutions short of tearing it out and doing it over are hard to come by.
Pour Day
Every form manufacturer specifies a mix for their brand of ICF. The local ready-mix plant may also have an ICF mix design that works well in the region. Typically, it’s a 3,000 psi mix with 3/8-inch aggregate and a slump of 5 ½ to 6 inches.
It is possible to fill ICFs without a pump truck, but a good boom pump truck with an experienced operator is so convenient and cost effective that it’s considered essential for ICF work. Traditionally, pumpers have used two 90º elbows attached to the end of the boom to slow the concrete down before it enters the forms. A few use a “ram’s horn” made from four elbows. Others prefer a reducing hose. Whatever the preference, make sure something is in place.
Schedule the pump truck to arrive at least an hour before the concrete. He’ll need the time to set outriggers, unfold the boom, and prime the pump. Trucks from the batch plant should be scheduled to arrive about 25 minutes apart.
Fill your openings—below window bucks and around doors—first to ensure good consolidation. Then work your way around the walls, filling the forms in four-foot lifts. If possible, avoid pouring concrete directly into the corners. Instead, hold the hose a few feet from the corner and let it gradually flow into place.
Vibration is essential. Most form manufacturers recommend a “pencil” vibrator with a head no larger than one inch in diameter. Oztec’s “stinger” vibrators and mechanical rebar shaker are a common option. The vibrator typically follows about six feet behind the boom operator. Insert the tip to the bottom of the lift (four feet, usually) and withdraw it slowly to give any trapped air enough time to escape.
Ironically, corners and lintels—the areas that need the most strength—are where poor consolidation is most likely to occur. That’s because these are the areas where reinforcing steel is most congested and ICF forms are at their weakest. Work these areas carefully to ensure good consolidation.
By starting with a good mix, placing it intelligently with a pump truck, and consolidating it carefully within the manufacturer’s guidelines, nearly all concrete placement problems can be avoided.
Before Becoming an Owner/Builder
- Educate yourself about ICFs. – Is this something you can realistically do?
- Choose a user-friendly block. Get as much training as possible beforehand.
- Find a distributor committed to your success.
- On the Jobsite, The Professional Should
- Check the footing prior to being poured.
- Ensure the first course of forms is plumb, level, and square.
- Provide quality bracing as needed.
- Inspect and correct deficiencies prior to each pour day.
- Be on-site during pours.
- Suggest subcontractors familiar with ICFs.
Return to Blog.
Read article at ICF Magazine.

